Photographing coins can seem a little tricky at first, right? You see these amazing shots online with all the tiny details showing. Well, it’s not magic. It’s mostly about knowing a few tricks and having the right gear. This guide is here to break down how to photograph coins properly, step by step. We’ll cover everything from what camera settings to use to how to make your coins look their absolute best. So, let’s get those coins looking sharp!
Key Takeaways
- Understanding different photography styles, like macro and close-up shots, helps you decide how to best show off your coins.
- Having the right equipment, such as a good camera, a macro lens, and a sturdy tripod, makes a big difference in photo quality.
- Getting your camera settings dialed in, especially aperture and ISO, is key for sharp, well-lit coin pictures.
- Simple steps like cleaning your coins and using natural light can really improve your shots.
- Editing your photos after you take them can make those details pop, but remember to keep it looking real.
Understanding Coin Photography Styles
When you’re getting into photographing coins, it’s not just about pointing your camera and clicking. There are different ways to shoot them, and each one shows off the coin a little differently. Think of it like choosing how to present a piece of art – you want the best angle, the right light, and the clearest view. Choosing the right style helps you capture exactly what makes that coin special.
Exploring Macro Photography
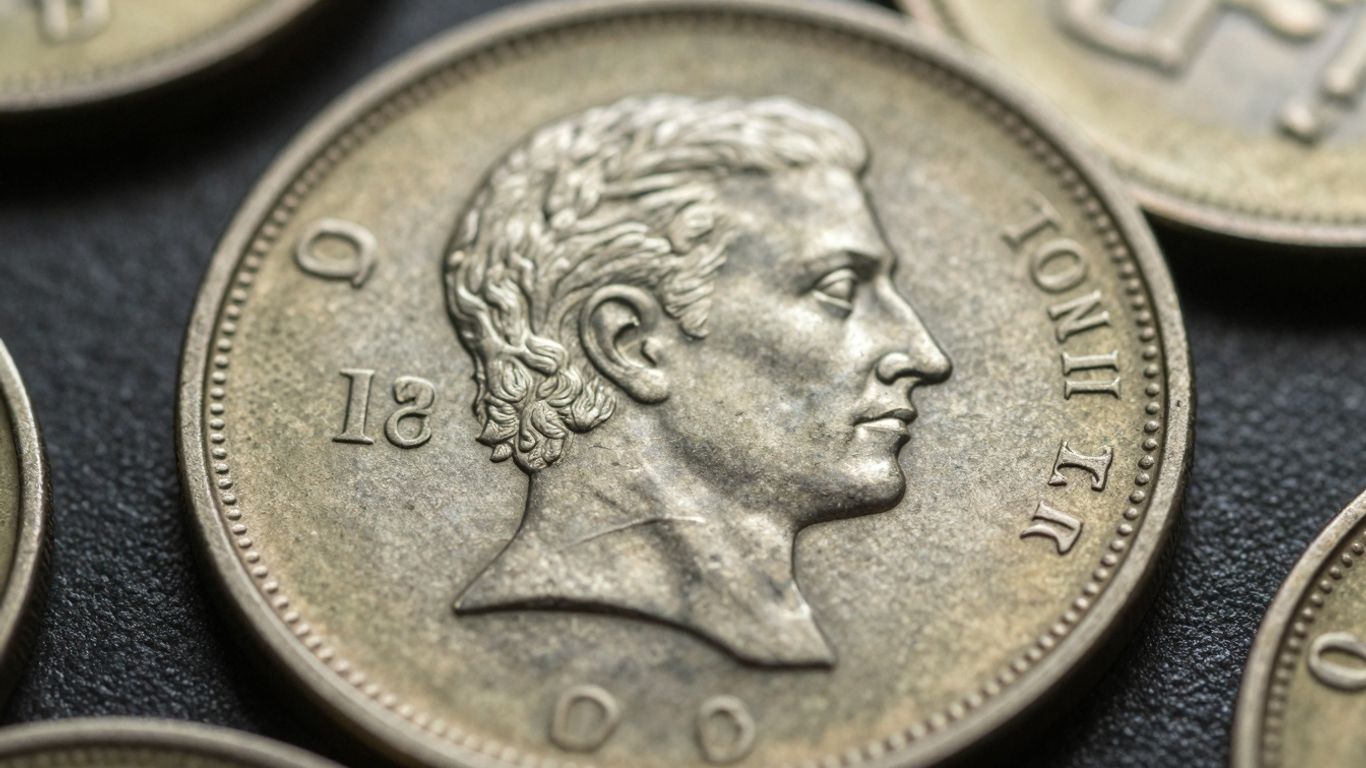
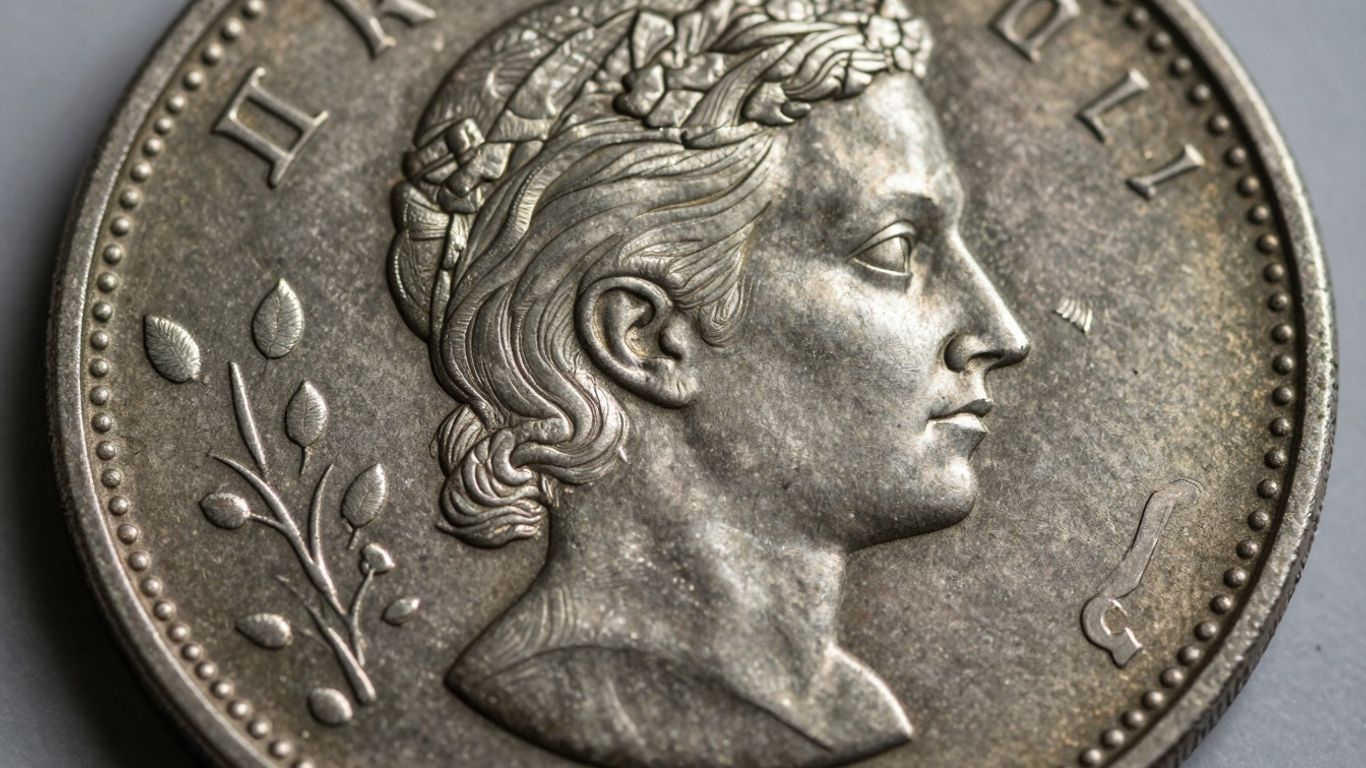
This is where you get really close. Macro photography is all about extreme close-ups. You’re trying to show off the tiniest details – maybe a little mint mark that’s hard to see, or the texture of the metal itself. It’s like using a magnifying glass with your camera. You’ll see every little scratch, every bit of wear, and the fine lines of the design. It’s perfect for showing off the craftsmanship that went into making the coin.
Defining Close-Up Photography
Close-up photography is similar to macro, but it’s usually a bit less extreme. Instead of filling the entire frame with just a tiny part of the coin, you might show a bit more of the coin’s surface. It still lets you see the details clearly, but you get a slightly broader view. This can be good if you want to show the overall design of the coin while still highlighting its finer points. It’s a good middle ground between a super-tight shot and a more standard picture.
Leveraging Ambient Light Photography
This style uses the light that’s already around you. Think natural sunlight coming through a window, or the light in a room. The idea is to use this existing light to make the coin look natural. It often creates softer shadows and can highlight the coin’s surface in a really pleasing way. It’s less about controlling every single light source and more about working with what you have. It can give your photos a more relaxed, authentic feel.
Implementing Studio Lighting Techniques
Studio lighting is the opposite of ambient. Here, you set up your own lights. This gives you total control. You can decide exactly where the light comes from, how bright it is, and what kind of shadows it makes. This is great for getting really professional-looking shots. You can use lights to bring out specific features of the coin or to create a dramatic look. It takes more effort to set up, but the results can be very precise and polished.
When you’re shooting coins, remember that light is your best friend for showing detail. Too much light can wash things out, and too little can hide the good stuff. Finding that balance is key, no matter which style you choose.
Selecting Essential Equipment for Coin Photography
Alright, so you want to take some killer photos of your coins? That’s awesome. But before you even think about pressing that shutter button, you gotta have the right gear. It’s not about having the most expensive stuff, but about having the tools that let you get the job done right. Think of it like this: you wouldn’t try to build a house with just a hammer, right? Same idea here.
Choosing the Right Camera for the Job
First things first, the camera. Now, you might be tempted to think you need some super fancy, professional-grade camera. And yeah, a DSLR or a mirrorless camera with manual controls is going to give you the most flexibility. You can tweak settings like aperture and shutter speed to get exactly the look you want. But honestly, a lot of modern smartphones have pretty decent cameras these days. If you’re just starting out or don’t want to break the bank, your phone might be good enough to get you going. Just make sure it has some manual controls or a good app that lets you adjust things like focus and exposure.
The Importance of Macro Lenses
This is where things get really interesting for coin photography. You need to get up close and personal with those tiny details, right? That’s where a macro lens comes in. A dedicated macro lens is probably the single most important piece of equipment for capturing the intricate designs on coins. It lets you focus really close and magnifies the subject, so you can see every little scratch, mint mark, and bit of engraving. If you don’t have a macro lens, a standard prime lens, like a 50mm, can work, but you’ll likely have to crop your photos later, which can reduce image quality. So, if you’re serious about coin photos, start looking into a macro lens.
Utilizing Stable Tripods
Okay, so you’ve got your camera and lens. Now, how do you keep things steady? Shaky hands are the enemy of sharp coin photos. That’s why a good, sturdy tripod is a must-have. It keeps your camera perfectly still, which is super important when you’re shooting at slower shutter speeds or using a macro lens where even the slightest movement is magnified. Look for one that’s stable, has adjustable height, and locks down securely. You don’t want your camera wobbling around mid-shot. A tripod also helps you keep the camera at the exact same angle for multiple shots, which is handy if you plan on doing any compositing later.
Essential Lighting Equipment
Lighting is everything. Seriously. You can have the best camera in the world, but if your lighting is bad, your photos will look flat and uninteresting. For coins, you want to highlight their texture and details without creating harsh glare or distracting reflections. Soft, diffused light is usually the way to go. You can achieve this using natural light from a window, but for more control, you might want to look into some artificial lighting. Things like LED panels, softboxes, or even a simple lightbox can make a huge difference. Having adjustable lights lets you play around with different angles and intensities to see what makes your coin pop. Don’t forget about reflectors and diffusers, too; they’re cheap but super effective for shaping light. You might also want to grab some basic coin collecting tools to handle your coins without leaving fingerprints.
Good lighting is key to revealing the subtle textures and details of a coin. It’s about controlling shadows and highlights so the viewer can appreciate the craftsmanship without being blinded by glare. Experimentation is your friend here; what looks good on one coin might need a different approach for another.
Mastering Camera Settings for Coin Photography
Getting the camera settings right for coin photography can feel a bit like a puzzle, but once you figure it out, your photos will look so much better. It’s all about balancing a few key things to make sure every detail of the coin pops.
Understanding Aperture Priority and Manual Modes
When you’re shooting coins, you’ve got a couple of main modes to play with on your camera. Aperture Priority (often shown as A or Av) is pretty handy because you set how wide or narrow the lens opening is, and the camera figures out the shutter speed for you. This is great for controlling how much of the coin is in focus. Manual mode (M), on the other hand, gives you total control over everything – aperture, shutter speed, and ISO. It takes more practice, but it’s the best way to get consistent shots, especially if your lighting isn’t changing.
Optimizing Aperture for Depth of Field
The aperture, or f-stop, is super important for coin photography. You want most of the coin to be sharp, right? This is called depth of field. For coins, which are usually pretty flat, you’ll want to use a narrower aperture, something like f/8 to f/16. This makes that sharp area deeper, so more of the coin stays in focus from edge to edge. If you go too wide with the aperture (like f/1.8), only a tiny slice of the coin might be sharp, and the rest will be blurry. It’s a trade-off, but for coins, more in-focus is usually better.
Balancing Shutter Speed and Stability
Shutter speed is how long the camera’s sensor is exposed to light. If you’re using a narrow aperture, you might need a slower shutter speed to get enough light. This is where camera shake becomes a real problem. Even the slightest movement can blur your photo. That’s why using a sturdy tripod is non-negotiable for coin photography. You might also need to use a remote shutter release or the camera’s self-timer to avoid bumping the camera when you press the button. A shutter speed between 1/60s and 1/2s is common, but you’ll adjust based on your lighting.
Maintaining Low ISO for Image Quality
ISO controls how sensitive your camera’s sensor is to light. While a higher ISO lets you shoot in darker conditions, it also introduces digital noise – those little speckles that make your image look grainy. For coin photography, where detail is king, you want to keep your ISO as low as possible, usually between 100 and 200. This gives you the cleanest images with the most detail. You’ll rely on good lighting and a steady tripod to compensate for the lower ISO.
Achieving Accurate White Balance
White balance tells your camera what
Practical Tips for Better Coin Photography
Getting great shots of your coins isn’t just about having the right gear; it’s also about how you handle the little things. You know, the stuff that makes a big difference between a ‘meh’ photo and a ‘wow’ photo. Let’s talk about some easy ways to up your coin photography game.
Ensuring Coin Cleanliness Before Shooting
First things first, your coin needs to be spotless. Even tiny specks of dust or fingerprints can look like craters under magnification. I usually grab a soft brush, like a makeup brush or a dedicated camera cleaning brush, and gently sweep away any loose debris. For stubborn smudges, a lint-free cloth can work wonders, but be gentle. You don’t want to accidentally scratch the coin. Also, make sure your shooting surface is clean. A messy background is just distracting.
Maximizing Natural Light Sources
Sunlight is your friend, and it’s free! Find a window with nice, diffused light. Avoid direct sun, as it creates harsh shadows and blown-out highlights. If the light is too strong, you can use a thin white sheet or a piece of parchment paper as a makeshift diffuser. Just hang it between the window and your coin. This softens the light and makes the coin’s details pop without those annoying glare spots. Sometimes, just moving the coin a foot or two can change the light dramatically, so play around with it.
Experimenting with Angles and Perspectives
Don’t just plop the coin down and shoot from directly above. That’s boring! Try tilting the coin slightly. Shoot from a lower angle, or even a higher one. Sometimes, catching the light just right on the rim or a specific part of the design makes all the difference. Think about what makes that particular coin special and try to show that off. A slight angle can reveal texture that a flat-on shot misses.
Using Remote Shutter Releases or Timers
Even with a tripod, pressing the shutter button can cause a tiny bit of shake. This is especially true for macro shots where everything is magnified. Using a remote shutter release or your camera’s built-in timer (usually a 2-second or 10-second delay) lets the camera settle completely before taking the picture. This simple step can save you from blurry shots and the frustration of having to reshoot. It’s a small thing, but it really helps get those tack-sharp images.
Remember, the goal is to show the coin as clearly and accurately as possible. Think about what details you want to highlight and adjust your lighting and angles to make them stand out. Patience is key here; don’t rush the process. Sometimes the best shot comes after a few minutes of tweaking.
Refining Your Coin Photography Techniques
Okay, so you’ve got your gear, you’ve figured out the basic settings, but how do you really make those coin photos pop? It’s all about tweaking those little things. Think of it like tuning a guitar – you get the basic chords right, but then you adjust the strings to get that perfect sound. Coin photography is kind of the same.
Focusing on Composition and Framing
This is where you decide what the viewer actually sees and how they see it. It’s not just about sticking the coin in the middle of the frame. You want to guide the eye. Think about the coin’s best features – maybe it’s a detailed portrait, a unique mint mark, or a cool edge. Frame your shot to highlight that. Sometimes, a bit of negative space around the coin can make it stand out more. Other times, you might want to get really close, filling the frame to show off every tiny detail. It really depends on what you’re trying to show off about that specific coin.
- Rule of Thirds: Imagine dividing your frame into nine equal squares. Placing your coin or its key features along these lines or at their intersections can create a more balanced and interesting image.
- Leading Lines: If the coin has any design elements that create lines, use them to draw the viewer’s eye towards the center or a specific point of interest.
- Symmetry: For some coins, especially older ones with very regular designs, a perfectly centered and symmetrical shot can be very effective.
Shooting in RAW Format for Flexibility
This is a big one, seriously. If your camera has a RAW setting, use it. Forget JPEG for a bit. RAW files are like a digital negative. They capture way more information than a compressed JPEG file. What does that mean for you? It means you have a lot more wiggle room when you get to editing. You can adjust the exposure, white balance, and colors much more without the image falling apart. It might seem like a hassle because RAW files are bigger and need editing, but trust me, it’s worth it for the control you get later.
When you shoot in RAW, you’re essentially capturing all the data the camera’s sensor can see. This gives you a much wider range to work with when you’re trying to fix lighting issues, correct colors, or bring out fine details that might have been lost in a JPEG.
Controlling Lighting to Enhance Details
Lighting is everything, right? For coins, you want to show off their texture and design without harsh glare. Think about where the light is coming from. Is it directly overhead? That might create a flat look or a big shiny spot. Try moving your light source to the side, or even slightly behind the coin, to create subtle shadows that define the relief and details. Using diffusers, like a piece of white cloth or a softbox, can really soften the light and make those metallic surfaces look much better. It’s all about finding that sweet spot where you can see all the details clearly without losing the coin’s natural shine.
| Lighting Setup | Effect on Coin | Best For |
|---|---|---|
| Direct Overhead | Flat, potential glare | Basic overview |
| Side Lighting | Creates shadows, defines relief | Showing texture and detail |
| Backlighting | Can create a rim light effect | Highlighting edges or unique shapes |
| Diffused Lighting | Soft, even illumination, reduces glare | General use, showing overall design |
Understanding Metering Modes for Exposure
Your camera’s meter is what tells it how bright or dark the picture should be. Different metering modes tell the camera to measure the light differently. For coins, which are often shiny and can be small against a background, the standard ‘evaluative’ or ‘matrix’ metering might get confused. It might try to expose for the background, making your coin too dark. That’s where ‘spot metering’ comes in handy. It measures the light in a tiny spot on your sensor, which you can place directly on the coin. This way, you’re telling the camera, ‘Expose for this specific spot.’ It gives you much more accurate control over how bright your coin actually appears in the photo. You might still need to make small adjustments, but it’s a much better starting point than letting the camera guess.
The Art of Editing and Post-Processing Coin Images
So, you’ve taken a bunch of photos of your coins. That’s great! But honestly, the work isn’t quite done yet. Editing is where you really make those images pop and show off all the cool details you captured. It’s not about faking anything; it’s about making sure what you saw with your eyes comes through in the picture.
The Importance of Post-Processing
Think of post-processing as the final polish. You want your coin photos to look as good as possible, right? Editing helps with that. It can fix little issues, bring out textures, and make the colors look true to life. Getting the editing right can make a good photo great. It’s a step that many people skip, but it really makes a difference in how professional your coin pictures look.
Exploring Software Options
There are tons of software choices out there, from super simple apps to the really fancy professional stuff. For most coin photographers, something like Adobe Lightroom or Photoshop is a solid choice. They give you a lot of control. But hey, if you’re just starting or don’t want to spend a lot, there are free options like GIMP or even mobile apps like Snapseed that can do a pretty good job for basic tweaks.
Techniques for Enhancing Details
When you’re editing, focus on bringing out the coin’s features. You can use sharpening tools, but be careful not to overdo it – you don’t want that weird halo effect. Adjusting contrast can make the relief stand out more. Sometimes, you might want to use local adjustments to brighten a specific area or darken a distracting background element. It’s all about making the coin the star. If you’re struggling with getting everything in focus, techniques like focus stacking can be a lifesaver, and editing software helps merge those shots.
Maintaining Authenticity in Edits
This is super important. While you want your photos to look good, you don’t want to change what the coin actually looks like. Don’t boost colors so much that they look fake, and don’t sharpen it to the point where it looks artificial. The goal is to represent the coin accurately. It’s a balance. You want to show its beauty without misrepresenting its condition.
Here’s a quick rundown of common adjustments:
- Exposure: Make sure the coin isn’t too dark or too bright.
- Contrast: Helps define the edges and details.
- White Balance: Gets the colors looking natural, not too blue or too yellow.
- Sharpness: Brings out fine textures, but use sparingly.
- Cropping: Refine the composition and remove distractions.
Common Mistakes to Avoid When Photographing Coins
Even when you’re really trying your best, it’s easy to mess up when you’re photographing coins. It happens to everyone, from beginners to folks who’ve been doing this for a while. But learning what can go wrong is half the battle, right? So, let’s talk about some of the usual suspects that can trip you up.
Preventing Overexposure or Underexposure
This is a big one. If your coin looks totally washed out, like all the detail is gone because it’s too bright, that’s overexposure. On the flip side, if it’s too dark and you can barely see what’s going on, that’s underexposure. Both situations make it hard to appreciate the coin’s features. You really want that sweet spot where all the details are visible and clear. Using your camera’s histogram is a good way to check if you’re in the right zone. It’s like a little graph that shows you the brightness levels in your photo.
Addressing Improper Composition
Sometimes, you just put the coin in the middle of the picture, and it looks… well, boring. Or maybe the background is super busy and distracting, pulling your eye away from the coin itself. That’s not great composition. You want the coin to be the star, and the background to support it, not compete with it. Think about where you place the coin in the frame. Using things like the rule of thirds or leaving some empty space around the coin can make a big difference in how the photo feels.
Avoiding the Use of Improper Equipment
Using the wrong gear can really hold you back. For instance, trying to get super close-up shots without a macro lens is often a recipe for blurry images or distorted perspectives. Or, if you’re not using a tripod, even the slightest shake of your hand can ruin a sharp photo, especially if you’re using slower shutter speeds. It’s like trying to build a house without the right tools – it’s just going to be a lot harder than it needs to be.
Here are a few common equipment missteps:
- Using a phone camera without proper lighting or stabilization: While phones are getting better, they often struggle with the fine details and reflective surfaces of coins without help.
- Not using a tripod: Handheld shots are almost always going to introduce some level of blur, no matter how steady you think you are.
- Relying solely on your camera’s built-in flash: This usually creates harsh, unflattering light and lots of glare.
Sometimes, the simplest solutions are overlooked. A steady surface, a bit of patience with your camera settings, and paying attention to how light falls on the coin can prevent many common issues. It’s not always about having the most expensive gear; it’s about knowing how to use what you have effectively.
Preserving and Displaying Your Coin Photographs
So, you’ve spent time and effort getting those coin photos just right. Now what? It’s not just about taking the picture; it’s about making sure those images last and that you can actually show them off. Think of it like preserving the coins themselves – you want to keep them in good condition.
Archiving Your Digital Images Securely
First things first, back up your photos. Seriously. Losing those high-resolution shots would be a real bummer. You don’t want to rely on just one place. Here’s a simple plan:
- Primary Storage: Keep your main photo files on your computer’s hard drive or a fast external drive. This is where you’ll access them most often.
- Backup Drive: Get a second external hard drive and copy everything over. Keep this drive somewhere safe, maybe even a different location if you’re really worried about disasters.
- Cloud Storage: Consider a cloud service. It might cost a bit, but it’s a great way to have off-site backups. Services like Google Drive, Dropbox, or specialized photo cloud storage can be really helpful.
The goal is to have at least two copies of your photos, with at least one copy being off-site. This way, if something happens to your home or your main computer, your precious coin images are still safe.
Choosing Printing and Framing Options
Sometimes, a digital file just doesn’t cut it. Printing your best coin photos can really bring them to life. When you’re thinking about printing, quality matters. Look for services that offer archival-quality paper and inks. This means the prints won’t fade or yellow over time, which is pretty important if you want them to last.
Framing is the next step. Think about how the frame will look with the photo and your decor. For valuable prints, consider UV-protective glass to shield them from light damage. It’s a bit more upfront cost, but it protects your investment.
Sharing Your Work Online
Sharing your coin photos is a fantastic way to connect with other collectors. Online forums and social media groups dedicated to numismatics are great places to start. You can get feedback, share knowledge, and even find inspiration from others. When you’re posting, try to give a little context about the coin – its history or any interesting details. This makes your post more engaging than just a picture. You might even find that your photography skills help others appreciate their own collections more. For instance, understanding how light wraps around a coin can reveal details you might not see otherwise, and sharing that tip can be really useful for fellow photographers photographing ancient coins.
Displaying your coin photos isn’t just about showing off. It’s about preserving a visual record and sharing the history and artistry captured in each coin. Whether it’s a digital archive, a framed print on your wall, or a post in an online community, the way you present your work matters.
Wrapping It Up
So, we’ve gone over a bunch of stuff about taking pictures of coins. It might seem like a lot, but really, it just comes down to paying attention to the details. Getting the lighting right, using the right gear, and not rushing the process are the big things. Don’t get discouraged if your first few tries aren’t perfect. Like anything, it takes practice. Keep at it, experiment with different setups, and you’ll start seeing your coin photos get better and better. It’s a pretty cool way to show off your collection, and honestly, it makes you appreciate the coins even more when you capture them just right.
Frequently Asked Questions
Can I take good coin pictures with just my phone?
You sure can! Modern phones take pretty decent pictures. But if you want really amazing, detailed shots, a special camera with different lenses will give you more control and better quality.
Do I really need a special macro lens?
A macro lens is super helpful for getting really close and showing off tiny details like the date or tiny marks. It’s not strictly required, but it makes a big difference for close-up shots.
How can I stop shiny coins from looking too glare-y?
To avoid bright glare, try using a special filter called a polarizing filter. You can also play around with how you set up your lights, moving them around until the glare disappears.
What's the best way to light up a coin for a photo?
It’s all about experimenting! Natural light from a window is great, or you can use soft, spread-out lights. The goal is to light the coin so you can see all its details without harsh shadows or bright spots.
What camera settings should I focus on?
You’ll want to use a small opening (like f/8 to f/16) to keep the whole coin in focus. Keep your camera steady with a tripod and try to use a low ISO number to keep the picture clear and free of graininess.
Why is it important to keep coins clean before taking pictures?
Dust, fingerprints, or smudges can really mess up a photo. Wiping your coin gently with a soft cloth or using a soft brush before shooting makes a huge difference in how clean and clear your picture looks.
Should I edit my coin photos afterward?
Yes, editing can make your photos look even better! You can adjust colors, brightness, and sharpness to make the coin’s details pop. Just be sure not to change how the coin actually looks too much.
What are the biggest mistakes people make when photographing coins?
Some common slip-ups include making the photo too bright or too dark, not arranging the coin nicely in the picture, or using equipment that’s not quite right for the job. Paying attention to these things helps a lot!